
0 Spicy Yoghurt | Last updated: 9 November 2026 | HTML5 game tutorial
Draw lines, shapes and text
Draw lines, shapes, curves, paths and text on the HTML5 canvas with JavaScript. Try every example in the live playground and save your drawing as an image. By the end of this tutorial, you'll be able to draw your own game graphics and text, with colors, gradients and shadows.
Part of the HTML5 game tutorial series
In the part about setting up an HTML5 canvas, you drew a single rectangle. Here, you go from that rectangle to lines, shapes, curves and text.
Show all partsHide all parts
OK, so you have a canvas. Now what? In this tutorial you'll learn the drawing operations you need for a 2D game. You'll start with rectangles and lines, and use paths to make triangles, circles and curves. Then you'll give them a color, a gradient or a shadow, and learn how to draw text. And if you'd rather design your shapes in a drawing program, you'll learn how to draw them from an SVG file. Every example has a demo you can edit, and at the end you'll find a playground where you can draw anything you like, with everything you've learned. We're going to start simple, with the basics.
Draw a rectangle on the canvas
Let's get started. In the previous tutorial on setting up an HTML5 canvas, you learned how to add a canvas to an HTML file and draw a simple rectangle on it. Here's a quick recap, with the canvas in your HTML and the JavaScript in a <script> element below it:
<canvas id="canvas" width="750" height="400">
    Your browser does not support the HTML5 canvas tag.
</canvas>
// Get a reference to the canvas and its context
const canvas = document.getElementById('canvas');
const context = canvas.getContext('2d');
// Draw a rectangle
context.fillStyle = '#ff8080';
context.fillRect(325, 62, 100, 75);The context is the object you draw with, and it has all the drawing functions. First, you pick a color by setting the context's fillStyle. Then fillRect() does the actual drawing.
You pass fillRect() the x and y of the top-left corner, 325 and 62, followed by the width and height of the rectangle, 100 and 75. Coordinates start at the top-left corner of the canvas, (0, 0), and y gets bigger as you go down.
This is how most canvas operations work. You define a style and then fill. You could say you first pick the brush you want to use and then start to paint.
Also notice how the color isn't passed to the fill function. It's stored in the context. This means every drawing operation after that uses the same paint. Until you change the fill style, of course.
Rectangles have two more useful functions. strokeRect() only draws the outline of a rectangle. clearRect() erases a rectangular area, so it's transparent again:
context.fillStyle = '#0099b0';
context.fillRect(170, 50, 150, 100);

// Cut a hole in the blue rectangle
context.clearRect(220, 75, 50, 50);

// Draw only the outline of a rectangle
context.strokeStyle = '#ff8080';
context.strokeRect(430, 50, 150, 100);You'll be using clearRect() a lot once things start to move. To animate, you wipe the whole canvas before every new frame with context.clearRect(0, 0, canvas.width, canvas.height). More on that in the tutorial about smooth canvas animations.
Draw shapes with paths
The canvas only has two primitive shapes: rectangles and paths. You could use the rectangle to draw a square, by giving it the same width and height. But if you want to draw anything else, like a triangle or a circle, you'll have to use a path. To sum it up:
- Rectangles - Use them to draw rectangles and squares.
- Paths - Use them to draw everything else: lines, triangles, circles, curves and any other shape.
A path starts with a call to beginPath(). This throws away any path you were working on before. A path stays in the context after you draw it, so without beginPath(), your next stroke() would draw the old lines again.
After beginPath(), you define the shape of your path with lines, arcs or curves. When you're done, you call fill() or stroke() to actually draw it on the canvas. Let's start with the most basic path of all, a line.
How to draw a line on the canvas
To draw a line, you need two functions. moveTo() tells the context where to start, without drawing anything. lineTo() adds a straight line from there to the point you give it. Here's an example:
context.beginPath();
context.moveTo(275, 50);
context.lineTo(475, 150);
context.stroke();When the path is complete, just a single line in this case, you call stroke() to make it visible. fill() wouldn't work here, since a line has no area to fill.
Each new call to lineTo() continues where the last line ended. That way you can draw a whole zigzag in one path. You can also change the color and thickness of the line, with strokeStyle and lineWidth:
context.beginPath();
context.moveTo(175, 150);
context.lineTo(275, 50);
context.lineTo(375, 150);
context.lineTo(475, 50);
context.lineTo(575, 150);

context.strokeStyle = '#0099b0';
context.lineWidth = 10;
context.stroke();By default, a line is black and 1 pixel wide. Just like the fill style, strokeStyle and lineWidth are stored in the context. So set them before you call stroke(), not after.
Line styles: caps, joins and dashes
Take a closer look at the zigzag. The corners are sharp points and the ends are cut off straight. That's the default, but you can change it:
- lineCap - The shape of the ends of a line: 'butt' (straight, the default), 'round' or 'square'.
- lineJoin - The shape of the corners: 'miter' (sharp, the default), 'round' or 'bevel' (cut off).
- setLineDash() - Turns it into a dashed line. You pass it a list of lengths, first a dash and then a gap.
Try them out in the demo below:
context.lineCap = 'butt';
context.lineJoin = 'miter';
context.setLineDash([]);A round or square cap makes the line a bit longer: half the line width at each end. That's also why the dotted button in the demo switches lineCap to 'round'. Its dashes are only 1 pixel long, and the round caps turn each one into a dot. To go back to a solid line, call setLineDash([]) with an empty list.
Draw with the mouse or your finger
So far, your code has decided what ends up on the canvas. Three pointer events let you draw on it yourself, with a mouse, a finger or a pen. The browser sends one of them each time you press, move or let go, and your code reacts:
- pointerdown - You press the mouse button or touch the screen. Your code remembers where the line starts.
- pointermove - You move the mouse or your finger. As long as you keep pressing, your code draws a short line from the last point to the new one.
- pointerup - You release the button or lift your finger. Your code stops drawing.
Here's the code and a demo:
let isDrawing = false;
let last = {x: 0, y: 0};

// Let a finger draw instead of scrolling the page
canvas.style.touchAction = 'none';

context.strokeStyle = '#0099b0';
context.lineWidth = 12;
// Each short line is its own path; round caps close the gaps
context.lineCap = 'round';

// The position of the pointer in canvas coordinates
function getPointerPosition(event) {
    let rect = canvas.getBoundingClientRect();
    return {
        x: (event.clientX - rect.left) * canvas.width / rect.width,
        y: (event.clientY - rect.top) * canvas.height / rect.height
    };
}

canvas.addEventListener('pointerdown', function (event) {
    isDrawing = true;
    last = getPointerPosition(event);
    // Still get pointerup if you let go outside the canvas
    canvas.setPointerCapture(event.pointerId);
});

canvas.addEventListener('pointermove', function (event) {
    if (!isDrawing) {
        return;
    }
    let point = getPointerPosition(event);

    context.beginPath();
    context.moveTo(last.x, last.y);
    context.lineTo(point.x, point.y);
    context.stroke();

    last = point;
});

canvas.addEventListener('pointerup', function () {
    isDrawing = false;
});
The function getPointerPosition() turns the position on the screen into a position on the canvas. That keeps the line under your finger, even when the canvas is scaled down to less than 750 pixels wide, like on a phone. The tutorial about setting up an HTML5 canvas explains how that works, and the one about keyboard, mouse and touch controls covers pointer events in more detail.
Want to save your drawings? The tutorial about IndexedDB shows you how to build a sketchbook that keeps them, even after you close the browser.
How to draw a triangle
By combining multiple lines in one path, you can draw more complex shapes. A triangle is just three lines, so let's try that:
context.beginPath();
context.moveTo(350, 100);
context.lineTo(400, 150);
context.lineTo(400, 50);
context.fill();Notice how lineTo() is called only twice, but a triangle has three sides. When you call fill(), the path is filled as if it were closed, so the third side appears automatically.
But what if you only want the outline of the triangle? Call stroke() instead of fill() and you're in for a surprise. It's not really a triangle. It's more like a rotated L-shape.
That's because stroke() only draws the lines that are in the path, and the line back to the start isn't one of them. So how do you fix this? Call closePath() before you stroke. It adds a line from the last point back to the first:
context.beginPath();
context.moveTo(350, 100);
context.lineTo(400, 150);
context.lineTo(400, 50);
context.closePath();
context.stroke();You could also add a third lineTo() back to the start. But look at the corner where the path begins: with a thick line, there's a notch in it. The start and the end of the path just overlap there. closePath() turns it into a real corner, styled with the lineJoin you've just learned about.
How to draw a circle on the canvas
A circle is a path too. You draw it with the arc() function:
context.beginPath();
context.arc(375, 100, 50, 0, 2 * Math.PI);
context.fill();The arc() function defines an arc-shaped path, in this case a full circle. It takes these arguments, in this order:
- x, y - The center of the circle.
- radius - The distance from the center to the edge. A larger radius makes a larger circle.
- startAngle, endAngle - Where the arc starts and ends, in radians.
Radians? If you're used to degrees, remember that Math.PI is half a circle (180 degrees) and 2 * Math.PI is a full circle (360 degrees). The angle starts to the right of the center, at 3 o'clock, and goes clockwise. So context.arc(375, 100, 50, 0, Math.PI) draws the bottom half of a circle. To convert degrees to radians, multiply by Math.PI / 180:
function degreesToRadians(degrees) {
    return degrees * Math.PI / 180;
}
Now let's draw something fun with arc(), like Pac-Man. He's a circle with a slice missing. The arc starts at 0.2 * Math.PI, a bit below 3 o'clock, and goes all the way around to 1.8 * Math.PI, a bit above 3 o'clock. Then a line back to the center makes the mouth:
// The body: a circle with the mouth left out
context.beginPath();
context.arc(290, 100, 60, 0.2 * Math.PI, 1.8 * Math.PI);
context.lineTo(290, 100);
context.fillStyle = '#ffcf51';
context.fill();

// The eye
context.beginPath();
context.arc(300, 70, 8, 0, 2 * Math.PI);
context.fillStyle = 'black';
context.fill();The demo adds three dots for him to eat. Without the lineTo() back to the center, fill() would close the path with a straight line between the two ends of the arc. Pac-Man would have a flat face instead of a mouth.
Want to make him chomp? Change the angles of the mouth a little in every frame. The tutorial about smooth canvas animations shows you how, using Math.sin().
Rounded rectangles and ellipses
Two more shapes are worth knowing, because they save you a lot of math.
roundRect() draws a rectangle with rounded corners. Unlike fillRect(), it adds a rectangle to the path, so you call beginPath() first and fill() or stroke() afterward. The first four numbers are the same as for fillRect(): x, y, width and height. The last one is the radius of the corners:
context.beginPath();
context.roundRect(125, 60, 200, 80, 20);
context.fillStyle = '#0099b0';
context.fill();
Perfect for a button in a game menu. You can also give each corner its own radius, by passing a list: [20, 20, 0, 0] only rounds the top corners. roundRect() works in all major browsers.
ellipse() is the stretched version of arc(). It takes a separate radius for the width and for the height, and a rotation in radians:
context.beginPath();
// x, y, radius x, radius y, rotation, start angle, end angle
context.ellipse(525, 100, 100, 40, 0, 0, 2 * Math.PI);
context.fillStyle = '#ff8080';
context.fill();A nice trick for your game is a flat, dark ellipse under a character. It makes a quick and convincing shadow.
Draw smooth curves
So far, all your lines have been straight. How do you draw a smooth curve? The canvas has two functions for that: quadraticCurveTo() and bezierCurveTo(). Both draw a curve from the current point to an end point, bent by one or two control points.
Think of a control point as a magnet. The curve doesn't go through it, but it's pulled toward it.
// One control point (170, 40), then the end point (300, 220)
context.beginPath();
context.moveTo(50, 220);
context.quadraticCurveTo(170, 40, 300, 220);
context.stroke();

// Two control points, then the end point
context.beginPath();
context.moveTo(400, 220);
context.bezierCurveTo(450, 40, 650, 280, 700, 150);
context.stroke();
A quadratic curve has one control point, so it can only bend one way. A Bézier curve has two, which lets you make an S-shape. It's the same kind of curve you work with in vector drawing programs like Inkscape, Affinity and Illustrator.
The easiest way to understand curves is to play with them. Drag any of the points in the demo below. The red ones are the control points. The code under the demo updates while you drag, so you can see exactly which numbers change:
context.lineWidth = 4;
context.strokeStyle = '#0099b0';

// One control point, then the end point
context.beginPath();
context.moveTo(50, 220);
context.quadraticCurveTo(170, 40, 300, 220);
context.stroke();

// Two control points, then the end point
context.beginPath();
context.moveTo(400, 220);
context.bezierCurveTo(450, 40, 650, 280, 700, 150);
context.stroke();Curves can be chained, just like lines. Each one starts where the last one ended. Draw a few curves in one path, fill it, and you have an organic shape, like a leaf or a chili pepper. This wouldn't be Spicy Yoghurt without a chili pepper, so you'll learn how to draw one in a minute.
The difference between fill and stroke
You've been using fill() and stroke() all along. But what exactly is the difference?
A fill colors the inside of a shape. It's completely filled with color. A stroke only draws the outline of a shape. The center stays empty.
You can also use both on the same shape, like the last two circles in the demo above. A stroke is centered on the edge of the shape, so half of the line falls inside it. Fill first and stroke after, or the fill covers that inner half:
context.beginPath();
context.arc(375, 100, 50, 0, 2 * Math.PI);
context.fillStyle = '#0099b0';
context.fill();

context.lineWidth = 6;
context.strokeStyle = '#ff8080';
context.stroke();
The rectangle and text functions come in pairs as well: fillRect() and strokeRect(), fillText() and strokeText().
Remember that the context stores your styles? It could surprise you. Here's an example:
context.beginPath();
context.arc(200, 100, 50, 0, 2 * Math.PI);
context.strokeStyle = '#0099b0';
context.stroke();

context.beginPath();
context.moveTo(325, 100);
context.lineTo(425, 150);
context.lineTo(425, 50);
context.closePath();
context.stroke();

context.strokeStyle = '#ff8080';
context.strokeRect(500, 50, 100, 100);The circle is drawn in blue. Then the triangle is drawn without picking a color. You might expect black, the default, but it's blue too. Only the square is red, because the stroke style changed right before it.
How to use colors on the canvas
You've used fillStyle and strokeStyle a lot by now. They take a color as a string, written just like in CSS. So you have plenty of options:
- Names - 'red', 'white' or 'tomato'. Easy to read, but there are just under 150 of them.
- Hex - '#ff8080', the red of Spicy Yoghurt. Two characters each for red, green and blue, from 00 to ff.
- rgb() and rgba() - 'rgb(255, 128, 128)' is the same red, with numbers from 0 to 255. The a in rgba() is the alpha, the transparency, from 0 (invisible) to 1 (solid).
- hsl() - 'hsl(0, 100%, 75%)' is that red again. First the hue, an angle on the color wheel (0 is red, 120 green and 240 blue), then the saturation and the lightness.
Here they are side by side:
const colors = [
    'red',
    '#ff8080',
    'rgb(255, 128, 128)',
    'rgba(255, 128, 128, 0.5)',
    'hsl(0, 100%, 75%)'
];

for (let i = 0; i < colors.length; i++) {
    context.fillStyle = colors[i];
    context.fillRect(35 + i * 140, 45, 120, 80);
}The second, third and fifth rectangles are exactly the same color. The fourth one is semi-transparent. It looks lighter, because the white page behind the canvas shows through.
hsl() is handy in a game. For example, you can keep the saturation and lightness the same and pick a random hue. That gives you a different color every time, and they all go well together:
const hue = Math.random() * 360;
context.fillStyle = 'hsl(' + hue + ', 100%, 75%)';
Want to make everything you draw transparent, not just one color? Set globalAlpha to a number between 0 (invisible) and 1 (solid), for example context.globalAlpha = 0.5. That's an easy way to fade out a game object. Like the other styles, it stays set until you change it, so set it back to 1 before you draw the next object.
Add gradients and shadows
A fill style doesn't have to be a single color. It can also be a gradient, a smooth blend from one color into another. You create it with context.createLinearGradient(), add colors with addColorStop() and use it as the fill or stroke style:
// A gradient from the top (y = 0) to the bottom (y = 200)
const sky = context.createLinearGradient(0, 0, 0, 200);
sky.addColorStop(0, '#0099b0');
sky.addColorStop(1, 'white');

context.fillStyle = sky;
context.fillRect(0, 0, canvas.width, 200);createLinearGradient() takes four numbers: the x and y of the start point, followed by the x and y of the end point. This gradient runs from (0, 0) at the top to (0, 200) at the bottom. Each color stop gets a position between 0 (the start) and 1 (the end).
The start and end points are canvas coordinates, not positions on the shape you fill. So for a gradient over one shape, you use the top and bottom of that shape, as in the chili pepper further down.
A radial gradient blends in circles instead of along a line. createRadialGradient() takes six numbers: the x, y and radius of an inner circle, and those of an outer circle. Here's an example:
// White in the center, gold at the edge
const gold = context.createRadialGradient(375, 100, 5, 375, 100, 80);
gold.addColorStop(0, 'white');
gold.addColorStop(1, '#ffb900');

context.fillStyle = gold;
context.beginPath();
context.arc(375, 100, 80, 0, 2 * Math.PI);
context.fill();Shadows work like the other styles. Set shadowColor and shadowBlur, and everything you draw next gets a blurry shadow around it:
context.shadowColor = 'orange';
context.shadowBlur = 30;
With shadowOffsetX and shadowOffsetY, you move the shadow to one side, like a real shadow. You don't even need a blur. A color and an offset give you a sharp shadow. Let's put curves, a gradient and a shadow together, and draw a spicy chili pepper:
// The background
context.fillStyle = '#ffe7a8';
context.fillRect(0, 0, canvas.width, canvas.height);

// The chili: red, and darker at the bottom
const red = context.createLinearGradient(0, 85, 0, 205);
red.addColorStop(0, '#ff8080');
red.addColorStop(1, '#ff4040');

// With a flat shadow below it
context.save();
context.fillStyle = red;
context.shadowColor = '#c7c7c7';
context.shadowOffsetX = 10;
context.shadowOffsetY = 18;

// The shape of the chili, made of curves
context.beginPath();
context.moveTo(250, 200);
context.bezierCurveTo(235, 140, 300, 110, 380, 110);
context.bezierCurveTo(460, 110, 520, 75, 565, 80);
context.bezierCurveTo(545, 115, 480, 160, 405, 170);
context.bezierCurveTo(330, 180, 300, 210, 250, 200);
context.fill();
context.restore();

// A shine on top, semi-transparent
context.save();
context.globalAlpha = 0.6;
context.fillStyle = 'white';
context.beginPath();
context.ellipse(390, 127, 28, 9, -0.15, 0, 2 * Math.PI);
context.fill();
context.restore();

// The green cap and the stem
context.fillStyle = '#37c871';
context.beginPath();
context.ellipse(255, 187, 22, 16, -0.6, 0, 2 * Math.PI);
context.fill();

context.strokeStyle = '#00a340';
context.lineWidth = 8;
context.lineCap = 'round';
context.beginPath();
context.moveTo(245, 197);
context.quadraticCurveTo(215, 215, 190, 205);
context.stroke();Did you notice save() and restore()? Shadows stay in the context, just like colors. Without restore(), the shine and the cap would get a shadow as well. save() stores all the current styles and restore() puts them back. It's a habit worth getting into. You'll see it again in the tutorial about images and sprites, where it's used to rotate images.
Draw an SVG path with Path2D
You can stack many drawing operations to create complex graphics. But what if a shape is so complex that writing every line and curve in code yourself doesn't cut it anymore? In those cases you can use an SVG path.
SVG, or scalable vector graphics, describes an image with lines and curves, instead of pixels. Just like the paths you've been making for the canvas. The big advantage of vector graphics is that they can be scaled without limit. Unlike regular images, they don't lose quality.
You can find SVG files online or create your own with vector drawing software, like Inkscape, Affinity or Illustrator. Want to give it a try? We have a tutorial on drawing vector potion bottles in Inkscape.
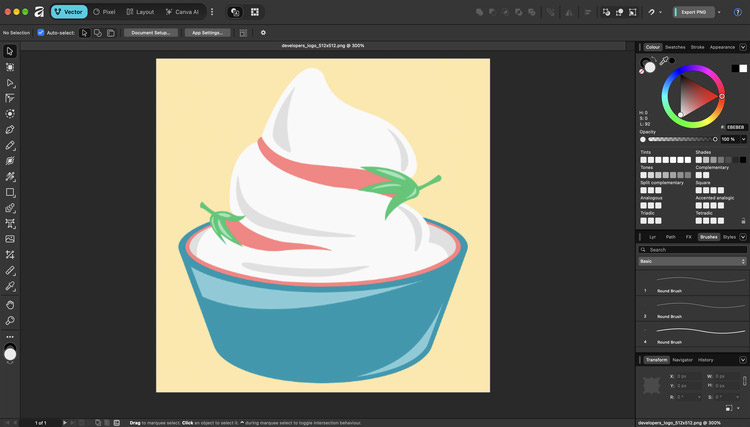
Inside an SVG file, you'll find the path information. It's actually pretty fun to check it out. It's just a long list of points, with moves, lines and curves. Here's part of a simple SVG file, a drawing of a heart. You can open it with any text editor:
<!-- Generator: Adobe Illustrator 19.0.0, SVG Export Plug-In . SVG Version: 6.00 Build 0)  -->
<svg version="1.1" id="Capa_1" xmlns="http://www.w3.org/2000/svg" xmlns:xlink="http://www.w3.org/1999/xlink" x="0px" y="0px" viewBox="0 0 50 50" style="enable-background:new 0 0 50 50;" xml:space="preserve">
<path style="fill:#D75A4A;" d="M24.85,10.126c2.018-4.783,6.628-8.125,11.99-8.125c7.223,0,12.425,6.179,13.079,13.543 c0,0,0.353,1.828-0.424,5.119c-1.058,4.482-3.545,8.464-6.898,11.503L24.85,48L7.402,32.165c-3.353-3.038-5.84-7.021-6.898-11.503 c-0.777-3.291-0.424-5.119-0.424-5.119C0.734,8.179,5.936,2,13.159,2C18.522,2,22.832,5.343,24.85,10.126z"/>
You can copy the path from the d attribute and pass it to a Path2D object:
const heart = new Path2D('M24.85,10.126c2.018-4.783,6.628-8.125,11.99-8.125c7.223,0,12.425,6.179,13.079,13.543 c0,0,0.353,1.828-0.424,5.119c-1.058,4.482-3.545,8.464-6.898,11.503L24.85,48L7.402,32.165c-3.353-3.038-5.84-7.021-6.898-11.503 c-0.777-3.291-0.424-5.119-0.424-5.119C0.734,8.179,5.936,2,13.159,2C18.522,2,22.832,5.343,24.85,10.126z');

context.fillStyle = '#ff8080';
context.strokeStyle = '#0099b0';
context.fill(heart);
context.stroke(heart);
The path describes exactly what the heart looks like. Pass it to fill() and stroke(), and it's drawn on the canvas. Notice there's no beginPath() here. A Path2D is a path of its own, separate from the one in the context.
The heart is drawn at the coordinates from the SVG file. The viewBox in that file is 50 by 50, so the heart fits in 50 by 50 pixels, in the top-left corner of the canvas. How do you draw it somewhere else?
Take a closer look at the path. Each letter is a command: M moves to a point, c draws a curve like bezierCurveTo(), l a line and z closes the path. A capital letter uses the coordinates of the canvas. A lowercase letter is relative: it's measured from the point where the last command ended. Apart from the M at the start, this path also has a capital L and a capital C, so those parts always end up in the same spot, wherever the M is.
If the rest of the path uses only lowercase letters, only the M at the start decides where the heart goes. You can't just change the letters, though, because the numbers after them would have to change too.
Luckily, many vector drawing programs can export a path like that. Look for an option for relative coordinates in the SVG export settings. Here's the lowercase version of the heart, in a function that creates it wherever you want:
// x and y are the dip at the top of the heart
function createHeart(x, y) {
    return new Path2D('M' + x + ',' + y + 'c2.018-4.783,6.628-8.125,11.99-8.125c7.223,0,12.425,6.179,13.079,13.543c0,0,0.353,1.828-0.424,5.119c-1.058,4.482-3.545,8.464-6.898,11.503l-17.747,15.834l-17.448-15.835c-3.353-3.038-5.84-7.021-6.898-11.503c-0.777-3.291-0.424-5.119-0.424-5.119c0.654-7.364,5.856-13.543,13.079-13.543c5.363,0,9.673,3.343,11.691,8.126z');
}
And here's the nice part. With this function you can draw as many hearts as you like. For example, to show how many lives your player has:
context.fillStyle = '#ff8080';
for (let i = 0; i < 3; i++) {
    context.fill(createHeart(315 + i * 60, 85));
}Draw text on the canvas
Aside from shapes and paths, you can also draw text on the canvas. You'll need it for the score or a game-over screen. Text has a fill and a stroke style, just like any other drawing operation. To draw a line of text, use fillText(). It takes the text, followed by the x and y coordinates:
context.font = '40px Arial';
context.fillStyle = 'black';
context.fillText('Game over', 280, 85);

// Only the outline of the letters
context.strokeStyle = '#ff8080';
context.strokeText('Game over', 280, 145);
The font property uses the same syntax as the CSS font property, like 'bold 30px Arial' or 'italic 20px sans-serif'. The default is a tiny '10px sans-serif', so you'll almost always want to set it.
You position text with textAlign and textBaseline. They're a bit tricky. They set which side of the text is aligned with the coordinates. So textAlign = 'right' displays the text to the left of the coordinates you gave. Not right. The same goes for textBaseline: textBaseline = 'bottom' displays the text above the point.
Confusing? Try it in the demo below. The red cross is the point you pass to fillText():
By default, textBaseline is 'alphabetic'. That's the line the letters sit on, like the lines on writing paper. That's also why text at y = 0 disappears: it's drawn above the top edge of the canvas.
To put text exactly in the center of the canvas, center it both ways:
context.textAlign = 'center';
context.textBaseline = 'middle';
context.fillText('Get ready!', canvas.width / 2, canvas.height / 2);
How wide is your text? measureText() tells you. That's useful for drawing a box behind the score that grows with the number:
const score = 1250;

context.font = '24px Arial';
context.textBaseline = 'middle';
const text = 'Score: ' + score;
const width = context.measureText(text).width;

context.fillStyle = '#0099b0';
context.fillRect(300, 30, width + 20, 40);
context.fillStyle = 'white';
context.fillText(text, 310, 50);If your text has to stay within a certain width, give fillText() a fourth argument: the maximum width. Longer text gets squeezed to fit, like this: context.fillText(playerName, 20, 50, 200).
The canvas doesn't wrap text over multiple lines. You'll have to do that yourself. Here's a small function that splits the text into words, and starts a new line when the next word doesn't fit:
function wrapText(text, x, y, maxWidth, lineHeight) {
    const words = text.split(' ');
    let line = '';

    for (const word of words) {
        const testLine = line ? line + ' ' + word : word;

        if (context.measureText(testLine).width > maxWidth && line) {
            // It doesn't fit, so draw the line and start a new one
            context.fillText(line, x, y);
            line = word;
            y += lineHeight;
        } else {
            line = testLine;
        }
    }
    context.fillText(line, x, y);
}
Set the font before you call wrapText(), because measureText() uses the current font. To see wrapText() in action, pick Text over multiple lines from the examples in the playground below.
One last thing. Does your text show up in the wrong font? If you use a web font, the browser only loads it when the page needs it. The canvas doesn't wait for that and draws with a fallback font right away. Load the font first with document.fonts.load(), and draw when it's ready:
document.fonts.load('30px Oswald').then(function () {
    context.font = '30px Oswald';
    context.fillText('Level 1', 50, 50);
});
This only works for a font that's in your CSS already, for example from Google Fonts.
Try it in the canvas playground
Now it's your turn. Below is a playground with a canvas and a code editor. Change the code and the canvas is redrawn right away. The canvas and context are ready for you, so you can start drawing immediately.
Pick one of the examples from this tutorial to start with, or clear the editor and start from scratch. Made something nice? Click Save image to download it. Every example in this tutorial also has an Edit in playground button that opens it right here.
If something goes wrong, the error and its line number show up below the editor. Don't worry, you can't break anything. Your code runs in its own sandbox, walled off from the rest of this page.
Common questions about drawing on the canvas
Why do my canvas lines look blurry?
On a high-resolution screen, like the ones on most phones and laptops, one canvas pixel is stretched over two or three screen pixels in each direction. To fix that, multiply the width and height of the canvas by window.devicePixelRatio, so it gets more pixels. Keep it the same size on the page with CSS, and scale the context up by the same ratio, so your drawing code still works with the original sizes:
const ratio = window.devicePixelRatio || 1;
canvas.width = 750 * ratio;
canvas.height = 400 * ratio;
canvas.style.width = '750px';
canvas.style.height = '400px';
context.scale(ratio, ratio);
After this, canvas.width is the width in canvas pixels, and no longer the width on the page. So in your drawing code, use 750 and 400 instead of canvas.width and canvas.height. If your game fills the whole window, the tutorial on setting up an HTML5 canvas shows how to combine this with scaling the canvas to fit the screen.
How do I clear the canvas?
Call context.clearRect(0, 0, canvas.width, canvas.height) to erase everything. In a game, you do this at the start of every frame, before you draw everything in its new position. The tutorial about smooth canvas animations explains why.
How do I change the color of a line?
Set strokeStyle before you call stroke(), for example context.strokeStyle = '#0099b0'. For the inside of a shape, you use fillStyle. Both take any CSS color, and they stay set until you change them.
How do I draw images and sprites?
With drawImage(). Once the image has loaded, give it the image and a position, like context.drawImage(image, 50, 50). Add a width and a height to resize it, or add more numbers to draw only part of the image, like one frame of a sprite sheet. You rotate it the same way as a shape, by rotating the context, which is explained a few questions further down. The tutorial about images and sprites explains all of it, from loading an image to a sprite animation:
Take it to the next level! Learn how to draw actual images on the canvas and use animation sprites to make your game come alive.
How do I draw a dashed or dotted line?
Use setLineDash() with the lengths of the dashes and gaps, like context.setLineDash([10, 5]). For dots, use a very short dash with a round cap and a thick line: setLineDash([1, 12]) with lineCap = 'round'.
How do I detect a click on a shape?
Store the shape as a Path2D, and pass it to isPointInPath() with the x and y of the mouse on the canvas, like context.isPointInPath(heart, x, y). It returns true if the point is inside the shape. For game objects that move around, simple math is often easier and faster, as explained in the tutorial about collision detection. The tutorial about JavaScript game controls shows how to get the position of the mouse, and how to drag shapes around.
Should I use canvas or SVG?
The canvas draws pixels. Once something is drawn, the canvas forgets it was a shape. That makes it fast for games, with lots of objects that are redrawn every frame. An SVG that you put in the page as an <svg> element works the other way around. Every shape in it stays an element of its own that you can style with CSS and click on. That's great for icons and charts, but it gets slow with thousands of moving objects. You don't have to pick one, though. You can create your graphics in SVG and draw them on the canvas: with Path2D, like the hearts above, or as an image with drawImage().
Why doesn't my text show up?
Check three things. Is the fill style the same color as the background? Is the text drawn above the top of the canvas? With the default baseline, text at y = 0 is drawn above the top edge. Or are you using a web font that hasn't loaded yet? The section about drawing text, earlier on this page, explains the last two.
How do I rotate a shape?
You don't rotate the shape, you rotate the context. Save the context with save(), move it to the center of your shape with translate(), call rotate() with an angle in radians, and draw the shape around (0, 0). For a rectangle of 100 by 50 pixels, that's context.fillRect(-50, -25, 100, 50). Then put the context back with restore(). The tutorial about images and sprites explains it step by step.
The complete code
Here's everything together in one file. On one canvas, it draws a shape from almost every section of this tutorial, from a rectangle to a heart and a line of text. Each shape has its own function, so you can easily switch one off or add your own. Use it as a starting point for your own drawings:
<!DOCTYPE html>
<html lang="en">

<head>
    <meta charset="UTF-8">

    <title>Draw on Canvas Tutorial | Spicy Yoghurt</title>
</head>

<body>
    <h1>Canvas drawing tutorial by Spicy Yoghurt</h1>
    <canvas
        id="canvas"
        width="750"
        height="400"
        style="border:1px solid lightgray;"
    >
        Your browser does not support the HTML5 canvas tag.
    </canvas>
    <script>
        'use strict';

        let canvas;
        let context;

        window.onload = init;

        function init() {
            canvas = document.getElementById('canvas');
            context = canvas.getContext('2d');

            // Draw something!
            draw();
        }

        function draw() {
            // Put // in front of a line to switch that drawing off
            drawRectangle();
            drawLine();
            drawTriangle();
            drawCircle();
            drawPacMan();
            drawRoundedRectangle();
            drawCurve();
            drawGlow();
            drawHeart();
            drawText();
        }

        function drawRectangle() {
            context.fillStyle = '#ff8080';
            context.fillRect(20, 20, 100, 75);
        }

        function drawLine() {
            context.beginPath();
            context.moveTo(150, 20);
            context.lineTo(250, 95);
            context.strokeStyle = '#0099b0';
            context.lineWidth = 4;
            context.stroke();
        }

        function drawTriangle() {
            context.beginPath();
            context.moveTo(280, 95);
            context.lineTo(330, 20);
            context.lineTo(380, 95);
            context.closePath();
            context.strokeStyle = '#ff8080';
            context.lineWidth = 6;
            context.stroke();
        }

        function drawCircle() {
            context.beginPath();
            context.arc(450, 57, 40, 0, 2 * Math.PI);
            context.fillStyle = '#0099b0';
            context.fill();
        }

        function drawPacMan() {
            // The body: a circle with the mouth left out
            context.beginPath();
            context.arc(590, 57, 40, 0.2 * Math.PI, 1.8 * Math.PI);
            context.lineTo(590, 57);
            context.fillStyle = '#ffcf51';
            context.fill();

            // The eye
            context.beginPath();
            context.arc(597, 37, 5, 0, 2 * Math.PI);
            context.fillStyle = 'black';
            context.fill();
        }

        function drawRoundedRectangle() {
            context.beginPath();
            context.roundRect(20, 170, 200, 80, 20);
            context.fillStyle = '#0099b0';
            context.fill();
        }

        function drawCurve() {
            context.beginPath();
            context.moveTo(260, 250);
            context.bezierCurveTo(300, 150, 400, 330, 440, 190);
            context.strokeStyle = '#ff8080';
            context.lineWidth = 4;
            context.stroke();
        }

        function drawGlow() {
            // White in the center, gold at the edge
            const gold = context.createRadialGradient(
                560, 210, 4,
                560, 210, 40
            );
            gold.addColorStop(0, 'white');
            gold.addColorStop(1, '#ffb900');

            context.fillStyle = gold;
            context.beginPath();
            context.arc(560, 210, 40, 0, 2 * Math.PI);
            context.fill();
        }

        function drawHeart() {
            context.fillStyle = '#ff8080';
            context.fill(createHeart(687, 195));
        }

        // A path from an SVG file.
        // x and y are the dip at the top of the heart
        function createHeart(x, y) {
            return new Path2D('M' + x + ',' + y + 'c2.018-4.783,6.628-8.125,11.99-8.125c7.223,0,12.425,6.179,13.079,13.543c0,0,0.353,1.828-0.424,5.119c-1.058,4.482-3.545,8.464-6.898,11.503l-17.747,15.834l-17.448-15.835c-3.353-3.038-5.84-7.021-6.898-11.503c-0.777-3.291-0.424-5.119-0.424-5.119c0.654-7.364,5.856-13.543,13.079-13.543c5.363,0,9.673,3.343,11.691,8.126z');
        }

        function drawText() {
            context.font = '40px Arial';
            context.fillStyle = 'black';
            context.textAlign = 'center';
            context.textBaseline = 'middle';
            context.fillText(
                'Lines, shapes, curves and text!', canvas.width / 2, 350
            );
        }
    </script>
</body>

</html>
What's next?
That's all for now on drawing operations. You can draw lines, shapes, curves, paths and text on the canvas, in any color, with gradients and shadows. You can even draw shapes from an SVG file. Try combining them to create your own graphics. Made something you're proud of? Paste your code in the comments. We'd love to see it. You can also download the example code here.
If you can't wait to draw images on the canvas, check out the images and sprite animation tutorial. Feel free to ask any tutorial-related questions in the comments.
Up next: Create a proper JavaScript game loop
Drawing on the canvas once is just the start. Now you'll learn how to redraw it many times per second.
Comments
Thanks! We've received your comment. We check every comment by hand before it appears, so this can take a few days.

No comments yet. Be the first to leave one!