
0 Spicy Yoghurt | Last updated: 15 November 2026 | Algorithm tutorial
Simulate a flock of birds with boids in JavaScript
Simulate a flock of birds in JavaScript with the boids algorithm. Code the three rules of flocking one by one, with a live demo for each step. Then add obstacles and a predator, and give the boids a field of view. By the end of this tutorial, you'll have a flock of thousands of boids running smoothly in your browser.
What is flocking?
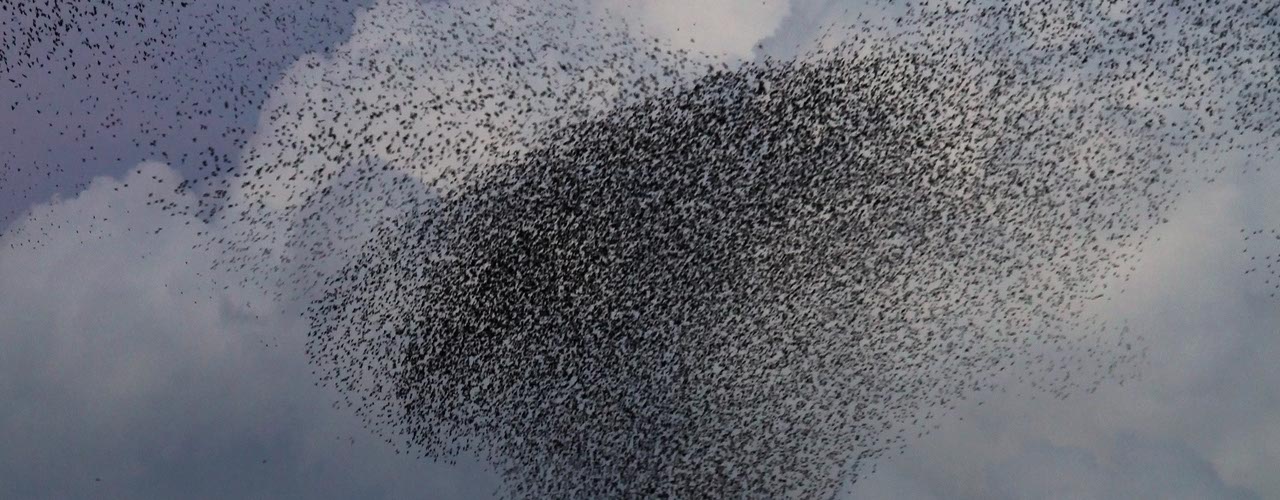
Watch a flock of starlings at sunset, and it looks like one big animal. Thousands of birds turn at the same moment, split up around a hawk and come back together. Yet no bird is in charge. Each one only keeps an eye on the few birds around it.
In 1986, Craig Reynolds turned that idea into a computer program. He called his simulated birds boids, short for bird-oid objects: objects that behave like birds. Every boid follows three simple rules, based only on its neighbors:
In each picture, the red boid is the one that follows the rule. Its neighbors are inside the big gray circle, and the blue arrow shows which way the rule steers it:
- Separation - Don't fly too close to your neighbors. In the picture, two of them are inside the dashed circle, so they're too close. Each gray arrow points away from one of them. Together, the gray arrows give the blue arrow its direction.
- Alignment - Fly in the same direction as your neighbors. The gray arrows show which way each boid flies. The neighbors fly up and to the right, but the red boid flies down. It turns toward the average of their directions.
- Cohesion - Stay close to your neighbors. Here, they're all on one side of the red boid, so it steers toward their average position: the dot in the middle of the group.
That's all. There's no rule for the flock as a whole, and yet a flock appears on the screen. This is called emergent behavior: simple rules for each part add up to something bigger. Conway's Game of Life works the same way, with cells instead of boids.
Boids soon found their way into movies. The first feature film to use them was Batman Returns, in 1992. Its swarms of bats and flocks of penguins were animated with a modified version of Reynolds' own boids program. In games, flocking is used to move birds, fish and crowds of characters, and researchers use it to fly swarms of drones.
In this tutorial, you'll build boids in plain JavaScript on the HTML5 canvas. You'll start with a single boid, add the three rules one by one, and then use them in a few practical examples.
Create a boid
A boid is just a point that moves. It has a position, x and y, and a velocity, vx and vy, in pixels per second. vx is how fast it moves to the right, and vy how fast it moves down. A negative value means it moves left or up.
To make a boid move, you need a game loop: a function that runs every frame. Each frame, it calls the boid's update() method, which moves the boid a little bit. If you haven't built a game loop before, the tutorial about the JavaScript game loop explains how. You'll write your own game loop further down, once you have a flock.
Here's a Boid class that moves at a constant velocity. When it flies off one side of the canvas, it comes back on the other side:
const canvasWidth = 750;
const canvasHeight = 400;

class Boid {
    constructor(x, y, vx, vy) {
        this.x = x;
        this.y = y;
        this.vx = vx;
        this.vy = vy;
    }

    update(secondsPassed) {
        this.x += this.vx * secondsPassed;
        this.y += this.vy * secondsPassed;

        // Fly off one side, and come back on the other
        if (this.x < 0) {
            this.x += canvasWidth;
        } else if (this.x > canvasWidth) {
            this.x -= canvasWidth;
        }
        if (this.y < 0) {
            this.y += canvasHeight;
        } else if (this.y > canvasHeight) {
            this.y -= canvasHeight;
        }
    }
}
secondsPassed is the time since the last frame. Because update() multiplies the velocity by secondsPassed, a boid flies at the same speed whether the animation runs at 60 or 144 frames per second. The tutorial on smooth canvas animation explains how this works.
To see which way a boid is flying, draw it as a triangle that points along its velocity. Add a draw() method to the Boid class. context is the object you draw with. You get it from your canvas with canvas.getContext('2d'), as the tutorial on how to set up an HTML5 canvas explains. The example code at the end of this page does this in init(). Math.atan2() turns the velocity into an angle, and rotate() rotates the canvas by that angle before you draw:
draw() {
    let angle = Math.atan2(this.vy, this.vx);

    context.save();
    context.translate(this.x, this.y);
    context.rotate(angle);
    context.beginPath();
    context.moveTo(8, 0);
    context.lineTo(-6, 5);
    context.lineTo(-6, -5);
    context.closePath();
    context.fillStyle = '#0099b0';
    context.fill();
    context.restore();
}
translate() moves the (0, 0) point of the canvas to the boid, so the triangle rotates around the boid itself. save() stores the state of the canvas, and restore() brings it back afterward. That undoes the move and the rotation, so the canvas is back to normal for the next boid.
The code draws the triangle pointing to the right, along the x-axis. Its tip is at (8, 0) and its back at x = -6, so a boid is 14 pixels long. After the rotation, it points the way the boid flies. The tutorial on sprite animations uses the same trick.
Now create a flock: a list of boids, each with a random position and a random direction. Every boid flies at maxSpeed, 120 pixels per second:
const boidCount = 60;
const maxSpeed = 120;

let boids = [];

function createFlock() {
    for (let i = 0; i < boidCount; i++) {
        // A random direction, from 0 to 360 degrees
        let angle = Math.random() * 2 * Math.PI;
        boids.push(new Boid(
            Math.random() * canvasWidth,
            Math.random() * canvasHeight,
            Math.cos(angle) * maxSpeed,
            Math.sin(angle) * maxSpeed
        ));
    }
}
Math.random() gives you a random number between 0 and 1. Multiply it by canvasWidth or canvasHeight, and you get a random x or y anywhere on the canvas. Want to know more about how random numbers work? The tutorial on random numbers in JavaScript starts with Math.random() and goes all the way to building your own random number generator.
Each boid also gets a random angle, and the code turns that angle into a velocity. Math.cos() and Math.sin() work in radians, not degrees. A full circle of 360 degrees is 2 * Math.PI radians, so Math.random() * 2 * Math.PI gives you a random angle anywhere on the circle. Together, Math.cos() and Math.sin() turn that angle into the x and y of an arrow with a length of 1, pointing in that direction. Multiply both by maxSpeed, and you have a velocity in that direction with a speed of exactly maxSpeed.
Call createFlock() once at the beginning, and then start the game loop with window.requestAnimationFrame(gameLoop). Every frame, the game loop clears the canvas and then updates and draws each boid:
let oldTimeStamp = 0;

function gameLoop(timeStamp) {
    let secondsPassed = (timeStamp - oldTimeStamp) / 1000;
    oldTimeStamp = timeStamp;

    // Don't jump ahead after the tab was hidden
    secondsPassed = Math.min(secondsPassed, 0.1);

    context.clearRect(0, 0, canvasWidth, canvasHeight);
    for (let boid of boids) {
        boid.update(secondsPassed);
        boid.draw();
    }

    window.requestAnimationFrame(gameLoop);
}
Here's the result:
Well, it's a start. Every boid flies in a straight line, without paying any attention to the others. That's not a flock yet.
Steer instead of turning instantly
Before a boid can follow any rules, it needs a way to change direction. The easiest option is to just give it a new velocity. But then a boid can change direction in a single frame, and no real bird turns like that.
Reynolds came up with something better: steering. First, you work out the desired velocity: the velocity the boid would like to have, at full speed in the direction it wants to go. The steering force is the difference between the desired velocity and the current velocity. Add a little of that force to the velocity every frame, and the boid turns gradually.
A new constant, maxForce, limits how hard a boid can steer. The higher it is, the faster the boid can turn. Add a steer() method to the Boid class. It takes a direction, x and y, and returns the steering force:
// Steer in the direction (x, y), capped at maxForce
steer(x, y) {
    let length = Math.hypot(x, y);
    if (length == 0) {
        return {x: 0, y: 0};
    }

    // The desired velocity minus the current velocity
    let steerX = x / length * maxSpeed - this.vx;
    let steerY = y / length * maxSpeed - this.vy;

    let force = Math.hypot(steerX, steerY);
    if (force > maxForce) {
        steerX *= maxForce / force;
        steerY *= maxForce / force;
    }
    return {x: steerX, y: steerY};
}
Math.hypot() uses the Pythagorean theorem to give you the length of a vector: the square root of x² + y². Dividing the direction by its length gives it a length of 1. This is called normalizing a vector, and the tutorial about keyboard, mouse and touch controls uses it too. Multiply by maxSpeed, and you have the desired velocity. If the steering force is stronger than maxForce, steer() scales it down to maxForce without changing its direction.
The steering force changes the velocity, just like gravity changes the velocity of a falling ball. It's an acceleration, in pixels per second per second. A boid has a mass of 1, so a force and an acceleration are the same thing. A boid keeps its acceleration in two new properties, this.ax and this.ay. Add them to the constructor, and use them at the start of update():
const maxForce = 200;

// In the Boid class
constructor(x, y, vx, vy) {
    this.x = x;
    this.y = y;
    this.vx = vx;
    this.vy = vy;
    this.ax = 0;
    this.ay = 0;
}

update(secondsPassed) {
    this.vx += this.ax * secondsPassed;
    this.vy += this.ay * secondsPassed;
    this.ax = 0;
    this.ay = 0;

    // Never fly faster than maxSpeed
    let speed = Math.hypot(this.vx, this.vy);
    if (speed > maxSpeed) {
        this.vx *= maxSpeed / speed;
        this.vy *= maxSpeed / speed;
    }

    this.x += this.vx * secondsPassed;
    this.y += this.vy * secondsPassed;

    // ...
}
After using the acceleration, update() sets it back to 0, but vx and vy keep the velocity the boid gained. Every frame, the boid works out a new steering force based on where it is at that moment.
Later on, a boid adds up several forces, and together they can push it past maxSpeed. That's why update() caps the speed.
Let's try it with a single boid that steers toward the mouse. pointer.x and pointer.y are the position of the mouse on the canvas. To see how to get them, look at addPointerEvents() and movePointer() in the example code at the end of this page. The direction to the mouse is the difference in x and y between the mouse and the boid. Put these lines in the game loop, before update():
let steering = boid.steer(pointer.x - boid.x, pointer.y - boid.y);
boid.ax = steering.x;
boid.ay = steering.y;
Steering toward a target like this is called seek, and it's the simplest steering behavior. Move your mouse over the canvas below, or touch it, and the boid steers toward the red dot under your mouse or finger. If you don't, the dot moves around by itself. The blue arrow is the current velocity, the gray arrow is the desired velocity and the red arrow is the steering force:

With a maxForce of 25, the boid swings wide around the dot, like a car taking a corner too fast. With 200, it takes the corner a lot more tightly. If you simply gave the boid a new velocity, it would fly straight to the dot at a constant speed. With steering, it curves toward the dot, and it overshoots when it's going fast. That curve is what makes boids look alive.
Seek is just one of many steering behaviors. The tutorial on steering behaviors covers several more, like pursue, wander and path following, each with its own demo.
Find each boid's neighbors
A real bird can't keep track of the whole flock. It only sees the birds near it. A boid works the same way: it only looks at the boids within a circle around it, and those are its neighbors. The radius of that circle is perceptionRadius.
Add a getNeighbors() method to the Boid class. It loops over all boids, skips the boid itself and keeps the ones that are close enough:
const perceptionRadius = 50;

// In the Boid class
getNeighbors(boids) {
    let neighbors = [];
    for (let other of boids) {
        if (other == this) {
            continue;
        }

        let dx = other.x - this.x;
        let dy = other.y - this.y;
        let distance = Math.hypot(dx, dy);
        if (distance < perceptionRadius) {
            neighbors.push(other);
        }
    }
    return neighbors;
}
dx and dy are the difference in x and y between the two boids, and Math.hypot() turns them into the distance. The tutorial about collision detection uses the same calculation to check if two circles overlap.
In the demo below, the red boid is the one looking around. The circle shows its perception radius, and the lines go to its neighbors. Change perceptionRadius and see how many neighbors it gets:
With a small radius, a boid hardly ever has a neighbor. With a big one, every boid reacts to a large part of the flock, and the three rules have a lot more neighbors to loop over. A radius of 50 pixels, a few times the size of a boid, works well.
Separation: don't crowd your neighbors
Now that a boid knows its neighbors, it can follow the three rules listed at the top of this page: separation, alignment and cohesion. You'll add them one at a time.
The first rule keeps boids from flying into each other. For every neighbor that's closer than separationDistance, take the direction away from it. Add up those directions, and steer that way:
const separationDistance = 25;

// In the Boid class
separate(neighbors) {
    let x = 0;
    let y = 0;
    for (let other of neighbors) {
        let dx = this.x - other.x;
        let dy = this.y - other.y;
        let distance = Math.hypot(dx, dy);
        if (distance > 0 && distance < separationDistance) {
            // Push away, harder when it's closer
            x += dx / distance / distance;
            y += dy / distance / distance;
        }
    }
    return this.steer(x, y);
}
This time, dx and dy point from the other boid to this one. Dividing them by distance gives that direction a length of 1. Dividing by distance once more makes a close neighbor count more than one farther away: a neighbor 5 pixels away counts four times as much as one 20 pixels away. steer() only uses the direction of the sum, so the boid mostly steers away from its closest neighbors. The check for distance > 0 skips a boid in exactly the same spot, because dividing by 0 would break the math.
separationDistance is half of perceptionRadius. So a boid sees all of its neighbors, but only moves away from the ones that come too close.
Further down, you'll put the three rules together in a new method, flock(). To try separation on its own, use its force the way you used seek, in the game loop, before you call update():
let force = boid.separate(boid.getNeighbors(boids));
boid.ax = force.x;
boid.ay = force.y;
Here's what that looks like. Click Restart to pack the boids together again:
The boids burst apart and keep their distance. But that's all they do. Without the other two rules, they don't fly together at all.
Alignment: fly in the same direction
The second rule makes a boid fly the same way as its neighbors. Add an align() method to the Boid class. It adds up the velocities of the boid's neighbors. The sum points in their average direction, and the boid steers in that direction:
align(neighbors) {
    let x = 0;
    let y = 0;
    for (let other of neighbors) {
        x += other.vx;
        y += other.vy;
    }
    return this.steer(x, y);
}
You don't have to divide by the number of neighbors to get the average direction. steer() only uses the direction of x and y, not their length. When there are no neighbors, x and y stay 0, and steer() returns no force at all. Here's alignment on its own:
Groups of boids start to fly side by side, like cars on a highway. But nothing keeps them apart, so they fly right over each other. And nothing pulls them together, so two groups only join up when they happen to meet.
Cohesion: stay close to the group
The third rule keeps the flock together. Add a cohere() method. It works out the center of the group around the boid, which is the average position of its neighbors, and steers toward it:
cohere(neighbors) {
    if (neighbors.length == 0) {
        return {x: 0, y: 0};
    }

    let x = 0;
    let y = 0;
    for (let other of neighbors) {
        x += other.x;
        y += other.y;
    }

    // Steer toward the average position of the neighbors
    let centerX = x / neighbors.length;
    let centerY = y / neighbors.length;
    return this.steer(centerX - this.x, centerY - this.y);
}
This time, you do need to divide by the number of neighbors, because the average position is a point, not a direction. Because of that division, cohere() returns right away when there are no neighbors: dividing 0 by 0 would give you NaN, and your boid would vanish without a trace. Here's cohesion on its own:
The boids gather into tight clumps and never let go. Each clump keeps pulling itself together until its boids sit almost on top of each other.
Put the three rules together
No single rule makes a flock on its own. Together, they do. Every rule returns a steering force, and the boid adds them up. Each rule has a weight that decides how much it counts. Add a flock() method that finds the neighbors, applies the three rules and adds up the forces:
const separationWeight = 2;
const alignmentWeight = 1;
const cohesionWeight = 1;

// In the Boid class
flock(boids) {
    let neighbors = this.getNeighbors(boids);
    let separation = this.separate(neighbors);
    let alignment = this.align(neighbors);
    let cohesion = this.cohere(neighbors);

    this.applyForce(separation, separationWeight);
    this.applyForce(alignment, alignmentWeight);
    this.applyForce(cohesion, cohesionWeight);
}

applyForce(force, weight) {
    this.ax += force.x * weight;
    this.ay += force.y * weight;
}
applyForce() multiplies a force by its weight and adds it to the acceleration. The acceleration starts at 0 every frame, because update() resets it after using it. In gameLoop(), first let every boid flock, and only then move and draw them all. These two loops replace the one you had before:
context.clearRect(0, 0, canvasWidth, canvasHeight);
for (let boid of boids) {
    boid.flock(boids);
}
for (let boid of boids) {
    boid.update(secondsPassed);
    boid.draw();
}
Why two loops? If a boid moved right after it looked at its neighbors, the next boid would see some neighbors in their old spot and some in their new one. The Game of Life has the same problem, and the same solution: calculate everything first, and then change it all at once.
Here's the flock with all three rules. Change the weights and watch what happens, or click Restart to start over with a new flock:
Here's what each weight does:
- separationWeight - The higher it is, the more space the boids keep between them. At 0, they pile up on top of each other.
- alignmentWeight - The higher it is, the more neatly the flock flies in one direction. At 0, the boids buzz around in a cloud.
- cohesionWeight - The higher it is, the tighter the groups. At 0, the flock slowly falls apart.
There's no single right setting. Birds, fish and insects each need their own weights, and finding them is half the fun.
Keep the flock on screen
So far, a boid that flies off one side of the canvas comes back on the other. That's easy: it's as if the opposite edges of the canvas were joined. But it has a catch. A boid at the right edge can be only a few pixels from one at the left edge, but getNeighbors() measures the distance straight across the canvas, so the two boids don't see each other. As a result, the flock breaks apart at the edges, and boids pop up out of nowhere on the other side.
Real birds don't fly through walls. They turn around. Give the canvas a margin along the edges. Inside that margin, a boid steers back toward the middle:
const edgeMargin = 50;
const edgeWeight = 3;

// In the Boid class
avoidEdges() {
    let x = 0;
    let y = 0;
    if (this.x < edgeMargin) {
        x = 1;
    } else if (this.x > canvasWidth - edgeMargin) {
        x = -1;
    }
    if (this.y < edgeMargin) {
        y = 1;
    } else if (this.y > canvasHeight - edgeMargin) {
        y = -1;
    }

    // The distance to the nearest edge of the canvas
    let distance = Math.min(
        this.x, canvasWidth - this.x,
        this.y, canvasHeight - this.y
    );

    // From 0 at edgeMargin to 1 at the edge of the canvas
    let strength = (edgeMargin - distance) / edgeMargin;
    let force = this.steer(x, y);
    return {x: force.x * strength, y: force.y * strength};
}
x and y point back toward the middle: 1 to the right or down, -1 to the left or up. steer() turns that direction into a steering force, just like it does for the three rules.
strength grows from 0 at the inner edge of the margin to 1 at the edge of the canvas, so a boid turns gently at first and more sharply the deeper it flies into the margin. Without strength, the inner edge of the margin would act like a wall. The boids in front would turn back right there, and the rest of the flock would pile up behind them.
Add the force to flock() with its own weight:
this.applyForce(this.avoidEdges(), edgeWeight);Keep the code in update() that wraps a boid around to the other side, as a safety net: a fast boid can still slip past the margin and off the canvas. Switch the demo between Wrap and Turn back:
With Turn back, the dashed line shows the margin. The flock turns around in a smooth curve and stays together.
Avoid obstacles
A flock in a game has to find its way around trees, rocks and walls. For a round obstacle, you can use the same idea as separation: when a boid comes too close, it steers away from the center of the obstacle. Keep the obstacles in a list, each with a position and a radius:
const avoidDistance = 30;
const obstacleWeight = 3;

let obstacles = [
    {x: 230, y: 150, radius: 40},
    {x: 520, y: 110, radius: 30},
    {x: 470, y: 220, radius: 25}
];
Then add an avoidObstacles() method to the Boid class:
avoidObstacles() {
    let x = 0;
    let y = 0;
    let strongest = 0;
    for (let obstacle of obstacles) {
        let dx = this.x - obstacle.x;
        let dy = this.y - obstacle.y;
        let distance = Math.hypot(dx, dy);

        // Within this distance of the center, steer away
        let safeDistance = obstacle.radius + avoidDistance;
        if (distance > 0 && distance < safeDistance) {
            // From 0 at safeDistance to 1 at the edge of the obstacle
            let strength = (safeDistance - distance) / avoidDistance;
            x += dx / distance * strength;
            y += dy / distance * strength;
            strongest = Math.max(strongest, strength);
        }
    }
    let force = this.steer(x, y);
    return {x: force.x * strongest, y: force.y * strongest};
}
A boid starts to steer away when it's less than avoidDistance from the edge of an obstacle. When a boid is near two obstacles at once, strength makes the nearer one count more. strongest holds the highest strength, and it scales the force just like strength does in avoidEdges(). That way, a boid turns gently at first and more sharply the closer it gets to an obstacle, and the flock doesn't bunch up in a ring around it.
Give this force a bigger weight than separation, because hitting a rock is worse than coming a bit too close to a neighbor:
this.applyForce(this.avoidObstacles(), obstacleWeight);Click or tap the canvas to place an obstacle, and click or tap an obstacle to remove it:
This works well for round obstacles in open space. For walls and mazes, a boid needs a real route around them, and that's a job for pathfinding. The pathfinding tutorial shows you how to find the shortest route around obstacles.
Flee from a predator
What's a flock without a hawk to scare it? Fleeing is the opposite of seeking: the boid steers away from the predator instead of toward it. It only does that when the predator is within fleeRadius:
const fleeRadius = 100;
const fleeWeight = 4;

// In the Boid class
flee(x, y) {
    let dx = this.x - x;
    let dy = this.y - y;
    if (Math.hypot(dx, dy) > fleeRadius) {
        return {x: 0, y: 0};
    }
    return this.steer(dx, dy);
}
This time, x and y aren't a direction but a point: the position of the predator. dx and dy point away from it. Use the mouse as the predator, and add the force in flock(). The boids should only flee while the mouse is over the canvas or a finger touches it. That's when pointer.isActive is true. Like pointer.x and pointer.y, it's set by addPointerEvents() and movePointer() in the example code at the end of this page. Give the force a big weight, because staying alive is more important than staying in line:
if (pointer.isActive) {
    let fleeForce = this.flee(pointer.x, pointer.y);
    this.applyForce(fleeForce, fleeWeight);
}
In the demo below, the predator can also be a hunter: a separate boid that chases the nearest boid in the flock and flies a little faster than the others. Switch the predator between Mouse and Hunter:
Watch how the flock splits up around the predator and closes up again behind it. Nobody told the flock to do that. It's just every boid fleeing and flocking at the same time.
Give the boids a field of view
So far, a boid sees in every direction, even straight behind it. Most birds have their eyes on the sides of their head, and they can't see what's right behind them. Give your boids a blind spot too. fieldOfView is how wide a boid can see, as an angle in degrees. A value of 270 leaves a blind spot of 90 degrees behind it.
To check if a neighbor is in sight, compare two directions: the direction the boid flies in, and the direction to the neighbor. The dot product of the two tells you how closely they point in the same direction. The tutorial about collision detection explains it with a demo. To calculate the dot product, multiply the two x values, multiply the two y values and add the results together. When both directions have a length of 1, the dot product is the cosine of the angle between them: 1 straight ahead, 0 to the side and -1 straight behind.
Change getNeighbors() like this:
const fieldOfView = 270;

// In the Boid class
getNeighbors(boids) {
    let neighbors = [];
    let speed = Math.hypot(this.vx, this.vy);

    // The edge of what the boid can see
    let viewCos = Math.cos(fieldOfView / 2 * Math.PI / 180);

    for (let other of boids) {
        if (other == this) {
            continue;
        }

        let dx = other.x - this.x;
        let dy = other.y - this.y;
        let distance = Math.hypot(dx, dy);
        if (distance >= perceptionRadius) {
            continue;
        }

        // Skip boids in the blind spot behind this one
        let dot = dx * this.vx + dy * this.vy;
        if (dot / (distance * speed) < viewCos) {
            continue;
        }
        neighbors.push(other);
    }
    return neighbors;
}
fieldOfView / 2 is the angle from straight ahead to the edge of what the boid sees: 135 degrees for a field of view of 270 degrees. Math.cos() works with radians, so the code multiplies by Math.PI / 180 first. The velocity and the direction to the neighbor don't have a length of 1, so the code divides their dot product by both lengths, distance and speed. A neighbor is in sight when the result is at least viewCos.
If distance or speed is 0, the dot product is 0 too, and 0 divided by 0 gives NaN. Any comparison with NaN is false, so the neighbor isn't skipped, and nothing breaks.
The red boid in the demo shows its field of view. Try 120°, and watch which neighbors it still sees:
With a narrow field of view, a boid only reacts to the boids in front of it. A boid at the front of the flock doesn't wait for the ones behind it, and a boid at the back follows the ones ahead.
Simulate thousands of boids with a grid
So far, every boid checks the distance to every other boid. With 200 boids, that's 200 times 199, or 39,800 distance checks per frame. With 1,000 boids, it's almost a million, and with 3,000, about 9 million. The work grows with the square of the number of boids, and at some point, your frame rate drops.
But a boid only cares about the boids within perceptionRadius. So to avoid most of those distance checks, divide the canvas into a grid of cells, each perceptionRadius wide. Then a boid's neighbors are always in its own cell or in one of the 8 cells around it, and it can skip all the other cells:
const cellSize = perceptionRadius;
const columns = Math.ceil(canvasWidth / cellSize);
const rows = Math.ceil(canvasHeight / cellSize);

let grid = [];

function getColumn(x) {
    return Math.min(Math.floor(x / cellSize), columns - 1);
}

function getRow(y) {
    return Math.min(Math.floor(y / cellSize), rows - 1);
}

function fillGrid() {
    grid = [];
    for (let i = 0; i < columns * rows; i++) {
        grid.push([]);
    }
    for (let boid of boids) {
        let column = getColumn(boid.x);
        let row = getRow(boid.y);
        grid[row * columns + column].push(boid);
    }
}

function getNearbyBoids(boid) {
    let column = getColumn(boid.x);
    let row = getRow(boid.y);
    let nearby = [];

    // The boid's own cell and the 8 cells around it
    for (let r = row - 1; r <= row + 1; r++) {
        for (let c = column - 1; c <= column + 1; c++) {
            if (c < 0 || c >= columns || r < 0 || r >= rows) {
                continue;
            }
            nearby = nearby.concat(grid[r * columns + c]);
        }
    }
    return nearby;
}
fillGrid() puts every boid in a cell. Each cell is a list of the boids in that part of the canvas. grid holds all cells in one long list, row by row, just like the cells in the tutorial on Conway's Game of Life. Each row takes up columns places in that list, so row r starts at r * columns, and the cell in column c of that row is at r * columns + c. Math.min() makes sure a boid that's exactly on the right or bottom edge still ends up in the last column or row. getNearbyBoids() collects the boids in the 3 by 3 block of cells around a boid, and skips the cells outside the canvas.
In the game loop, fill the grid once per frame, and give each boid only the nearby boids:
fillGrid();
for (let boid of boids) {
    boid.flock(getNearbyBoids(boid));
}
Compare the flock with and without the grid in the demo below. It shows the number of distance checks per frame and how long the flocking code takes each frame. With 3,000 boids and no grid, the demo can start to stutter, especially on a phone, but it won't crash your browser or your device.
Without the grid, 3,000 boids need about 9 million distance checks per frame. With the grid, each boid only checks the boids in 9 cells, so the number of checks grows much more slowly as you add boids. The collision detection tutorial calls this a broad phase: a quick check that finds the objects that might be close, before the narrow phase does the exact check. At 3,000 boids, the grid cuts the number of checks to about a tenth, and the flocking code runs about three times as fast.
Keep units from overlapping in a strategy game
In a strategy game, you select a group of units and click where they should go. If every unit walks straight to that point, they all end up in the same spot, stacked on top of each other. Separation fixes that: the units spread out around the point.
There's one more steering behavior you need here: arrive. It's like seek, but the unit slows down when it gets close, so it stops at the target instead of shooting past it. Give steer() a third parameter, the speed the boid wants to have:
steer(x, y, speed = maxSpeed) {
    let length = Math.hypot(x, y);
    if (length == 0) {
        return {x: 0, y: 0};
    }

    let steerX = x / length * speed - this.vx;
    let steerY = y / length * speed - this.vy;

    // ...
}
speed = maxSpeed gives the parameter a default value. The rules don't pass a speed, so they still steer at full speed. Then add an arrive() method:
const slowRadius = 80;

// In the Boid class
arrive(x, y) {
    let dx = x - this.x;
    let dy = y - this.y;
    let distance = Math.hypot(dx, dy);

    // Within slowRadius, slow down to 0 at the target
    let speed = maxSpeed;
    if (distance < slowRadius) {
        speed = maxSpeed * distance / slowRadius;
    }
    return this.steer(dx, dy, speed);
}
Like flee(), arrive() takes a point instead of a direction: the position of the target. units is a list of Boid objects, just like boids, and target is an object with an x and a y. The units only use separation and arrive, not alignment or cohesion. For every unit, the game loop does this instead of calling flock():
let neighbors = unit.getNeighbors(units);
unit.applyForce(unit.separate(neighbors), separationWeight);
unit.applyForce(unit.arrive(target.x, target.y), 1);
A click or tap sets target to the position of the pointer. Click or tap where the group should go, and switch Separation off and on:
With Separation off, all units walk to the same spot and pile up on top of each other. With Separation on, they spread out neatly around the target. A real strategy game also needs a route around walls and buildings. Pathfinding finds that route, and steering keeps the units apart along the way.
Combine all the settings in a flocking playground
Time to play. The playground below has everything from this tutorial in one place. Pick a preset, and the same code gives you a murmuration of starlings, a school of fish or a flock of sheep. Then change the number of boids, the field of view and the predator. Move your mouse or finger over the canvas to be the falcon, the shark or the sheepdog:
The presets only change settings you already know: maxSpeed, maxForce, perceptionRadius, separationDistance and the three weights. Sheep are slow and hardly align, so they mill around in a herd. Fish align strongly and turn as one. Starlings are fast, with a small separation distance, so they fly in a dense cloud.
Want more to play with? Flock Lab is a bigger version of this playground. It has obstacles you can place, room for up to 3,000 boids and a slider for every setting. You can get its complete code as a premium download. It's also a nice way to support Spicy Yoghurt.
Common questions about flocking
Why are boids called boids?
Craig Reynolds came up with the name in 1986. It's short for bird-oid object: an object that behaves like a bird. He used it for any simulated animal that moves in a group: not just birds, but also fish in schools and land animals in herds.
Who invented the boids algorithm?
Craig Reynolds, a computer graphics researcher. He wrote the boids program in 1986 and presented it at SIGGRAPH in 1987, in a paper called Flocks, Herds, and Schools: A Distributed Behavioral Model. His website still has his notes and the films that used boids.
How do real birds flock?
Much like boids, with one difference. In 2008, researchers who filmed flocks of starlings in Rome found that each bird keeps track of about six or seven neighbors, no matter how far away they are. Boids use a fixed radius instead. Following a fixed number of neighbors helps a real flock stay together, even when it spreads out to escape a hawk.
How many boids can JavaScript handle?
Without a grid, about 2,000 at 60 frames per second on a fast laptop, and about 500 on an older phone. Drawing that many boids takes hardly any time. The slow part is the flocking itself, because the number of distance checks grows with the square of the number of boids. With a grid, the flocking runs two to three times as fast, and the same laptop handles about 3,000 boids at close to 60 fps. For tens of thousands of boids, let the graphics chip in your computer or phone do the work, using WebGL or WebGPU.
Why do my boids clump or jitter?
Boids clump when cohesion is stronger than separation. Make separationWeight bigger than cohesionWeight, and keep separationDistance at about half of perceptionRadius. Boids jitter when their velocity changes too much in a single frame. Multiply the acceleration by secondsPassed, like update() does, and don't make maxForce or the weights much bigger than the values in this tutorial.
What's the difference between flocking and swarming?
In everyday English, birds and sheep flock, and insects swarm. In programming, flocking usually means boids, like on this page. Swarming usually refers to swarm intelligence: a broader term for groups of simple agents that solve a problem together, like ants finding the shortest route to food.
How do I make boids in 3D?
Give every boid a z and a vz, and do every calculation with three numbers instead of two. The rules don't change: distances, averages and the dot product work the same way in 3D. You can draw the boids on the 2D canvas yourself, but then you have to work out the perspective and project each one onto the flat screen. A 3D library like three.js handles that for you, and gives you a camera and lighting too.
Example code: flocking with boids
Here's an example page that puts the basics from this tutorial together in a single HTML file: the three rules, turning back at the edges, the field of view, the grid and the mouse as a predator. Paste the code below into an HTML file and open it in your browser.
Want to see the grid at work? Change boidCount to 3000 in the settings at the top of the script:
<!DOCTYPE html>
<html lang="en">

<head>
    <meta charset="UTF-8">

    <title>Boids Flocking Tutorial | Spicy Yoghurt</title>
    <style>
        #canvas {
            width: 750px;
            height: 400px;
            border: 1px solid lightgray;
            touch-action: none;
        }
    </style>
</head>

<body>
    <h1>Boids flocking tutorial by Spicy Yoghurt</h1>
    <canvas id="canvas" width="750" height="400">
        Your browser does not support the HTML5 canvas tag.
    </canvas>
    <script>
        'use strict';

        // The size of the canvas
        const canvasWidth = 750;
        const canvasHeight = 400;

        // The flock
        const boidCount = 200;
        const maxSpeed = 120;
        const maxForce = 200;

        // What a boid sees
        const perceptionRadius = 50;
        const fieldOfView = 270;

        // The three rules
        const separationDistance = 25;
        const separationWeight = 2;
        const alignmentWeight = 1;
        const cohesionWeight = 1;

        // The edges and the predator
        const edgeMargin = 50;
        const edgeWeight = 3;
        const fleeRadius = 100;
        const fleeWeight = 4;

        // The grid, with cells as wide as the perception radius
        const cellSize = perceptionRadius;
        const columns = Math.ceil(canvasWidth / cellSize);
        const rows = Math.ceil(canvasHeight / cellSize);

        let canvas;
        let context;
        let boids = [];
        let grid = [];
        let pointer = {x: 0, y: 0, isActive: false};
        let oldTimeStamp = 0;

        class Boid {
            constructor(x, y, vx, vy) {
                this.x = x;
                this.y = y;
                this.vx = vx;
                this.vy = vy;
                this.ax = 0;
                this.ay = 0;
            }

            // Steer in the direction (x, y), capped at maxForce
            steer(x, y) {
                let length = Math.hypot(x, y);
                if (length == 0) {
                    return {x: 0, y: 0};
                }

                // The desired velocity minus the current velocity
                let steerX = x / length * maxSpeed - this.vx;
                let steerY = y / length * maxSpeed - this.vy;

                let force = Math.hypot(steerX, steerY);
                if (force > maxForce) {
                    steerX *= maxForce / force;
                    steerY *= maxForce / force;
                }
                return {x: steerX, y: steerY};
            }

            getNeighbors(boids) {
                let neighbors = [];
                let speed = Math.hypot(this.vx, this.vy);

                // The edge of what the boid can see
                let viewCos = Math.cos(fieldOfView / 2 * Math.PI / 180);

                for (let other of boids) {
                    if (other == this) {
                        continue;
                    }

                    let dx = other.x - this.x;
                    let dy = other.y - this.y;
                    let distance = Math.hypot(dx, dy);
                    if (distance >= perceptionRadius) {
                        continue;
                    }

                    // Skip boids in the blind spot behind this one
                    let dot = dx * this.vx + dy * this.vy;
                    if (dot / (distance * speed) < viewCos) {
                        continue;
                    }
                    neighbors.push(other);
                }
                return neighbors;
            }

            separate(neighbors) {
                let x = 0;
                let y = 0;
                for (let other of neighbors) {
                    let dx = this.x - other.x;
                    let dy = this.y - other.y;
                    let distance = Math.hypot(dx, dy);
                    if (distance > 0 && distance < separationDistance) {
                        // Push away, harder when it's closer
                        x += dx / distance / distance;
                        y += dy / distance / distance;
                    }
                }
                return this.steer(x, y);
            }

            align(neighbors) {
                let x = 0;
                let y = 0;
                for (let other of neighbors) {
                    x += other.vx;
                    y += other.vy;
                }
                return this.steer(x, y);
            }

            cohere(neighbors) {
                if (neighbors.length == 0) {
                    return {x: 0, y: 0};
                }

                let x = 0;
                let y = 0;
                for (let other of neighbors) {
                    x += other.x;
                    y += other.y;
                }

                // Steer toward the average position of the neighbors
                let centerX = x / neighbors.length;
                let centerY = y / neighbors.length;
                return this.steer(centerX - this.x, centerY - this.y);
            }

            avoidEdges() {
                let x = 0;
                let y = 0;
                if (this.x < edgeMargin) {
                    x = 1;
                } else if (this.x > canvasWidth - edgeMargin) {
                    x = -1;
                }
                if (this.y < edgeMargin) {
                    y = 1;
                } else if (this.y > canvasHeight - edgeMargin) {
                    y = -1;
                }

                // The distance to the nearest edge of the canvas
                let distance = Math.min(
                    this.x, canvasWidth - this.x,
                    this.y, canvasHeight - this.y
                );

                // From 0 at edgeMargin to 1 at the edge of the canvas
                let strength = (edgeMargin - distance) / edgeMargin;
                let force = this.steer(x, y);
                return {x: force.x * strength, y: force.y * strength};
            }

            flee(x, y) {
                let dx = this.x - x;
                let dy = this.y - y;
                if (Math.hypot(dx, dy) > fleeRadius) {
                    return {x: 0, y: 0};
                }
                return this.steer(dx, dy);
            }

            flock(boids) {
                let neighbors = this.getNeighbors(boids);
                let separation = this.separate(neighbors);
                let alignment = this.align(neighbors);
                let cohesion = this.cohere(neighbors);

                this.applyForce(separation, separationWeight);
                this.applyForce(alignment, alignmentWeight);
                this.applyForce(cohesion, cohesionWeight);
                this.applyForce(this.avoidEdges(), edgeWeight);

                if (pointer.isActive) {
                    let fleeForce = this.flee(pointer.x, pointer.y);
                    this.applyForce(fleeForce, fleeWeight);
                }
            }

            applyForce(force, weight) {
                this.ax += force.x * weight;
                this.ay += force.y * weight;
            }

            update(secondsPassed) {
                this.vx += this.ax * secondsPassed;
                this.vy += this.ay * secondsPassed;
                this.ax = 0;
                this.ay = 0;

                // Never fly faster than maxSpeed
                let speed = Math.hypot(this.vx, this.vy);
                if (speed > maxSpeed) {
                    this.vx *= maxSpeed / speed;
                    this.vy *= maxSpeed / speed;
                }

                this.x += this.vx * secondsPassed;
                this.y += this.vy * secondsPassed;

                // Fly off one side, and come back on the other
                if (this.x < 0) {
                    this.x += canvasWidth;
                } else if (this.x > canvasWidth) {
                    this.x -= canvasWidth;
                }
                if (this.y < 0) {
                    this.y += canvasHeight;
                } else if (this.y > canvasHeight) {
                    this.y -= canvasHeight;
                }
            }

            draw() {
                let angle = Math.atan2(this.vy, this.vx);

                context.save();
                context.translate(this.x, this.y);
                context.rotate(angle);
                context.beginPath();
                context.moveTo(8, 0);
                context.lineTo(-6, 5);
                context.lineTo(-6, -5);
                context.closePath();
                context.fillStyle = '#0099b0';
                context.fill();
                context.restore();
            }
        }

        window.onload = init;

        function init() {
            canvas = document.getElementById('canvas');
            context = canvas.getContext('2d');
            createFlock();
            addPointerEvents();
            window.requestAnimationFrame(gameLoop);
        }

        function createFlock() {
            for (let i = 0; i < boidCount; i++) {
                // A random direction, from 0 to 360 degrees
                let angle = Math.random() * 2 * Math.PI;
                boids.push(new Boid(
                    Math.random() * canvasWidth,
                    Math.random() * canvasHeight,
                    Math.cos(angle) * maxSpeed,
                    Math.sin(angle) * maxSpeed
                ));
            }
        }

        function addPointerEvents() {
            canvas.addEventListener('pointermove', movePointer);
            canvas.addEventListener('pointerdown', movePointer);
            canvas.addEventListener('pointerleave', function () {
                pointer.isActive = false;
            });
            canvas.addEventListener('pointerup', function (event) {
                // The predator disappears when you lift your finger
                if (event.pointerType != 'mouse') {
                    pointer.isActive = false;
                }
            });
        }

        function movePointer(event) {
            // The position on the canvas, even when it's scaled
            let rect = canvas.getBoundingClientRect();
            let scaleX = canvasWidth / rect.width;
            let scaleY = canvasHeight / rect.height;
            pointer.x = (event.clientX - rect.left) * scaleX;
            pointer.y = (event.clientY - rect.top) * scaleY;
            pointer.isActive = true;
        }

        function getColumn(x) {
            return Math.min(Math.floor(x / cellSize), columns - 1);
        }

        function getRow(y) {
            return Math.min(Math.floor(y / cellSize), rows - 1);
        }

        function fillGrid() {
            grid = [];
            for (let i = 0; i < columns * rows; i++) {
                grid.push([]);
            }
            for (let boid of boids) {
                let column = getColumn(boid.x);
                let row = getRow(boid.y);
                grid[row * columns + column].push(boid);
            }
        }

        function getNearbyBoids(boid) {
            let column = getColumn(boid.x);
            let row = getRow(boid.y);
            let nearby = [];

            // The boid's own cell and the 8 cells around it
            for (let r = row - 1; r <= row + 1; r++) {
                for (let c = column - 1; c <= column + 1; c++) {
                    if (c < 0 || c >= columns || r < 0 || r >= rows) {
                        continue;
                    }
                    nearby = nearby.concat(grid[r * columns + c]);
                }
            }
            return nearby;
        }

        function gameLoop(timeStamp) {
            let secondsPassed = (timeStamp - oldTimeStamp) / 1000;
            oldTimeStamp = timeStamp;

            // Don't jump ahead after the tab was hidden
            secondsPassed = Math.min(secondsPassed, 0.1);

            // First let every boid flock, then move them all
            fillGrid();
            for (let boid of boids) {
                boid.flock(getNearbyBoids(boid));
            }
            for (let boid of boids) {
                boid.update(secondsPassed);
            }

            draw();
            window.requestAnimationFrame(gameLoop);
        }

        function draw() {
            context.clearRect(0, 0, canvasWidth, canvasHeight);

            for (let boid of boids) {
                boid.draw();
            }

            // The predator
            if (pointer.isActive) {
                context.beginPath();
                context.arc(pointer.x, pointer.y, 8, 0, 2 * Math.PI);
                context.fillStyle = '#ff8080';
                context.fill();
            }
        }
    </script>
</body>

</html>
Conclusion
Boids show how a few simple rules can create something that looks alive. Each boid avoids crowding its neighbors, flies the same way they do and stays close to them. You've learned how steering works, how to find neighbors quickly with a grid, and how to add obstacles, predators and a field of view. And with seek, flee and arrive, you can steer just about anything in your game.
The tutorial on steering behaviors picks up where this one leaves off, with leader following, feelers to stay away from walls, flow fields and more, each with its own demo.
If you'd like to see more emergent behavior, the tutorial on Conway's Game of Life is a good next step. In it, you build a grid of cells that follow a few simple rules, and patterns appear that seem to move and grow on their own.
That's all for now. If you have any questions, feel free to ask them in the comment section. Found a setting that makes a beautiful flock? Share it in the comments. You can download the example code here.
More Algorithm tutorials
Steering behaviors in JavaScript: seek, flee, arrive, wander and more
Learn to code steering behaviors in JavaScript, from seek and arrive to wander, pursue and path following. Every behavior is a short method you can copy, with a live demo on the HTML5 canvas to play with. Then combine them, and your game characters will find their own way around.

Create Conway's Game of Life in JavaScript
Create Conway's Game of Life in JavaScript on the HTML5 canvas. Learn the rules, calculate which cells live or die each generation and draw your own cells with the mouse. Load famous patterns like the glider gun, and download the free example code as a single HTML file.
Comments
Thanks! We've received your comment. We check every comment by hand before it appears, so this can take a few days.

No comments yet. Be the first to leave one!